This page is basically notes to myself so I can fix things in the future but it may be helpful to others with the monitor. Don't do what I did and replace capacitors with whatever you have on hand even if they are too small. This fix could've been done for good in 2017 without replacing any mosfets if I'd just used the correct values instead of "close enough".
Sections:
Ever try to turn on your ASUS monitor and only get a black screen (no light at all) and a blinking blue status indicator/power light on the bezel? Well, there's a good chance that means the electrolytic capacitors in your monitor's power supply have died. It's time to pop it open and replace them.
The VH236H has no external screws. You have to use a flathead screwdriver or appropriate replacement tool to pry off the bezel. Just fiddle around a bit to find the right seam. It'll start snapping open progressively. To take off the case back you have to detach a cover panel from the back of the *stand arm* (not the inside/underside screws!). The back of the monitor *stand arm* just pops off when pryed with a screwdriver and then the 3 screws underneath need to come out.
So, I guess what my question is, how worried should I be about replacing those 2 caps with replacements that are only 70% of the original's capacity? The adjacency of the power transitor and large inductor make me worry they're involved in some sort of switched inductance voltage regulator and the change in capacity will change the output voltage or frequency.
I've already ordered actualy 680uF replacements but they won't be here for a week. The 480uF were just what I had on hand for a temporary fix. The monitor has been working for a handful of hours now with the sub-optimal fix but I worry if the output voltage varies it'll end up doing permanent damage.
The "temporary" replacement caps worked for about a year and then it died again, predictably. I was sick of it so I bought a new monitor and put it in storage. Fast forwards 5 years and I'm looking at buying more monitors when I realize I should just fix the old one.
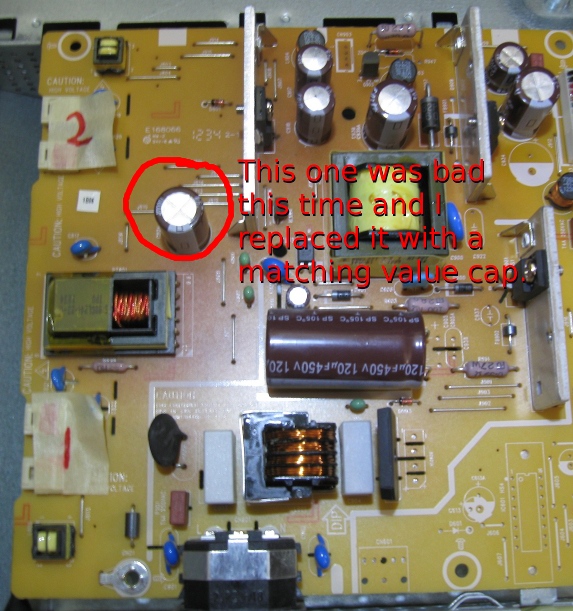
So, I took it apart again (no easy task, and somehow I always forget the tricky parts) and the "temporary" replacement caps of the wrong values were fine, but a new electrolytic cap had failed. So I replace it with an exactly matching valued cap and reassemble. But the monitor still doesn't work and the blue power indicator just blinks. I leave it plugged in and poke around a while with a multimeter to see if things are getting excited, I try feeling for hot parts... and then I hear a very quiet regular "click"ing. Turn on, hummmmzzzzz, click, off. This cycle continues in synch with the blue light flashing on and off. I try to find it by sound but I can't localize the noise. And then suddenly a big "pop", I turn the board over and one of the SOP-8 ICs has blow up and become a light emitting diode.
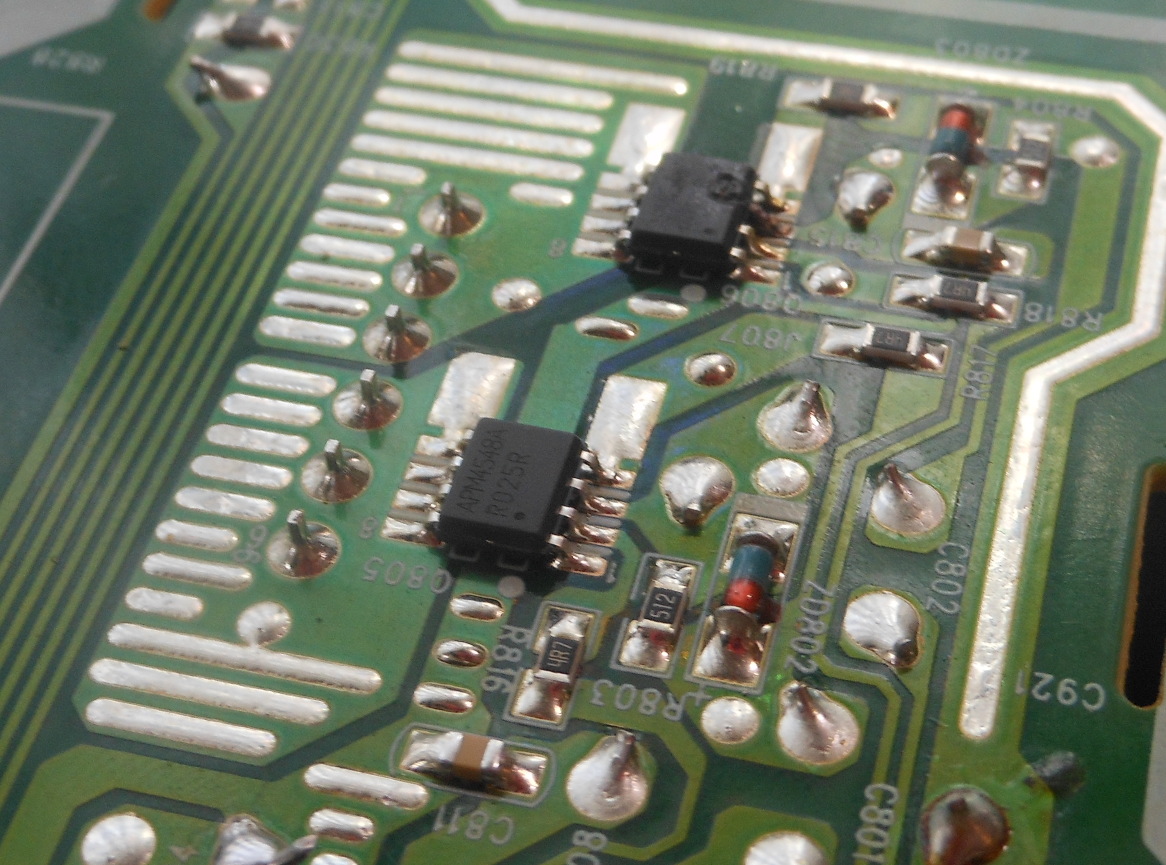
Now... I don't know if my poking around blew the IC, or if it was the problem all along. But I do now have a target to replace. After some squinting and angling and macro photography I find out it's a "APM4548A" and some search later reveals this is a "Dual Enhancement Mode MOSFET (N-and P-Channel) SOP-8" and they're available on eBay. So now I'm waiting for parts to ship again then I'll replace the LCD driver mosfet and try again. The service manual parts list says "Q805 057G 763 91 ET AO4620 7.2A/30V -5.3A/-30V SOIC-8"
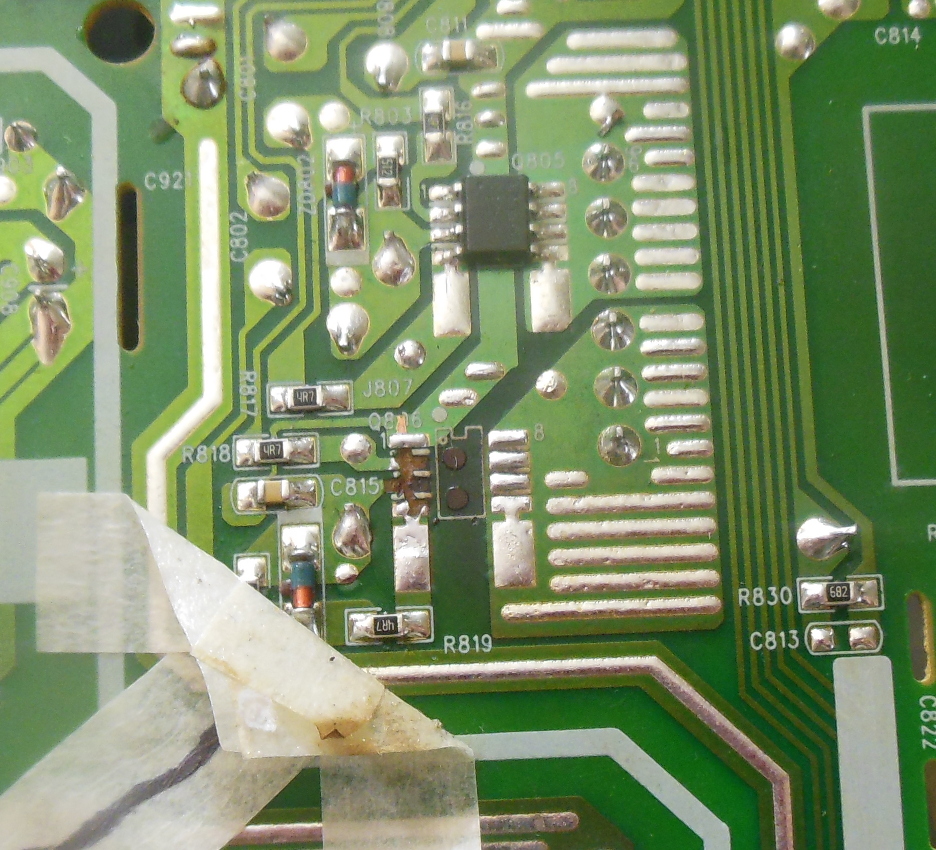
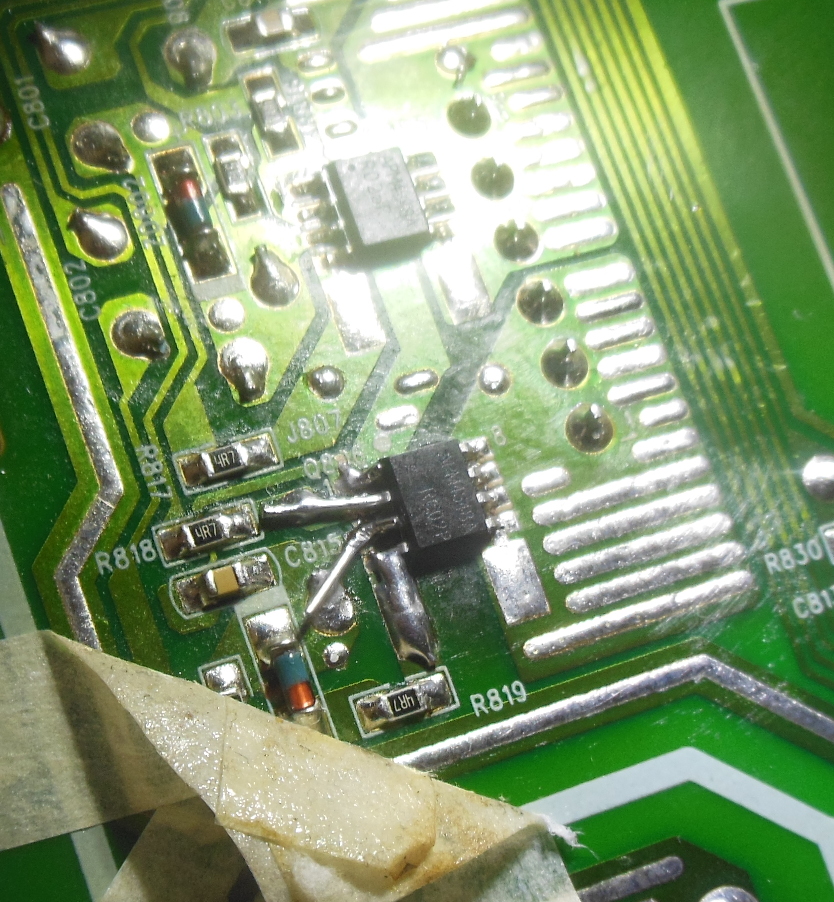
I finally (after years) got around to actually replacing the blown mosfet. Also putting in the proper value electrolytic caps so it doesn't happen again. During the process of trying to lift the mosfet off the board I stupidly became frustrated and scraped off most of the traces on one side. In order to fix this I used bodge wires of bare copper wire to connect to bits of the traces still left over at a distance.
Surprisingly this worked and the monitor turns on and functions perfectly again. This was quite a journey of procrastination and intermittent half ass repairs. Hopefully this one lasts. Back in 2017 I asked "how worried should I be about replacing those 2 caps with replacements that are only 70% of the original's capacity?" and the answer was "Very." it caused 2 separate break-downs. Don't do what I did. Always replace with equal spec parts.
But as a note to my future self: to take apart the monitor case you have to detach the panel from the back of the stand arm (not the inside/underside screws!). The back of the monitor stand arm just pops off with a screwdriver and then the 3 screws underneath need to come out.
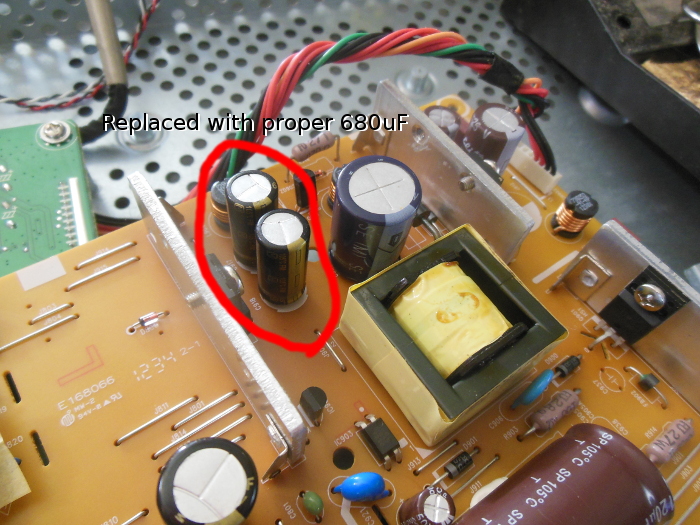

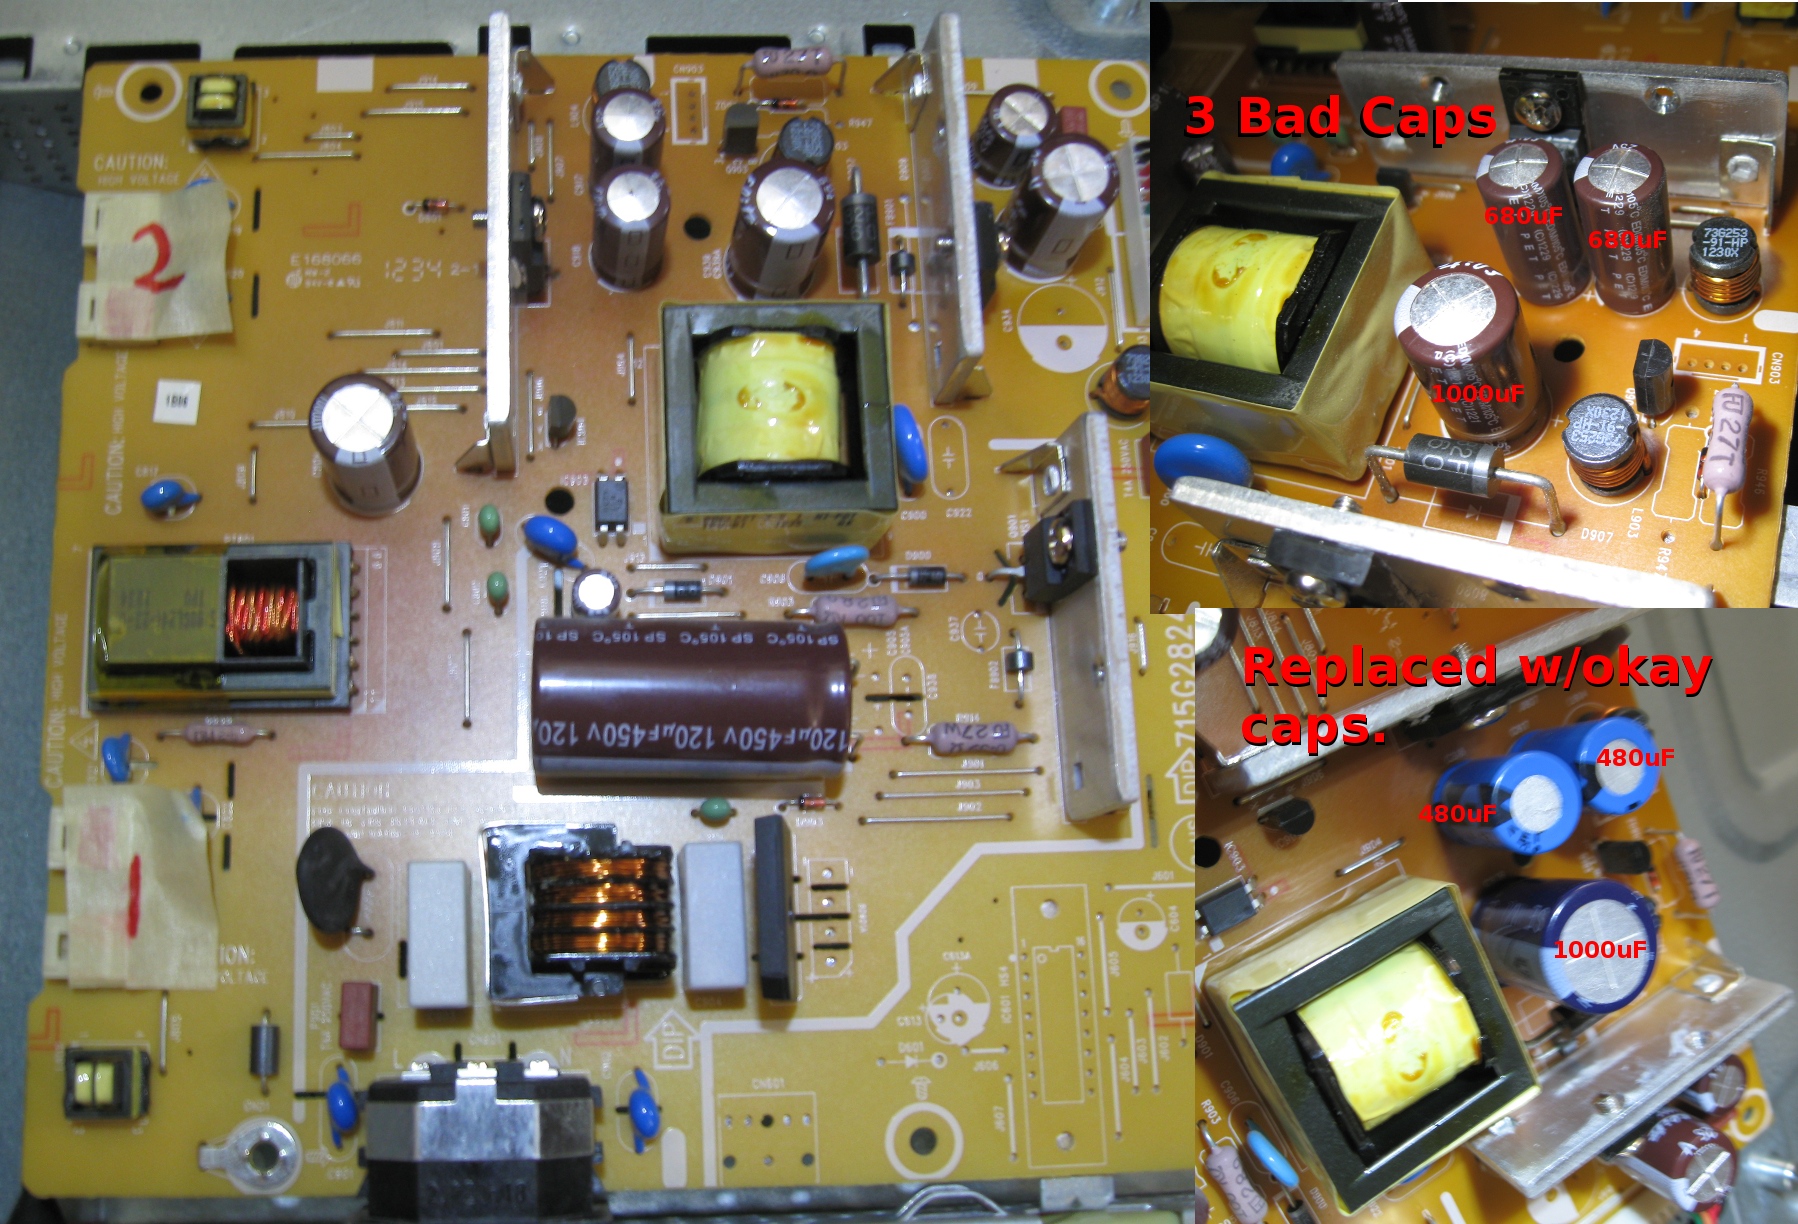
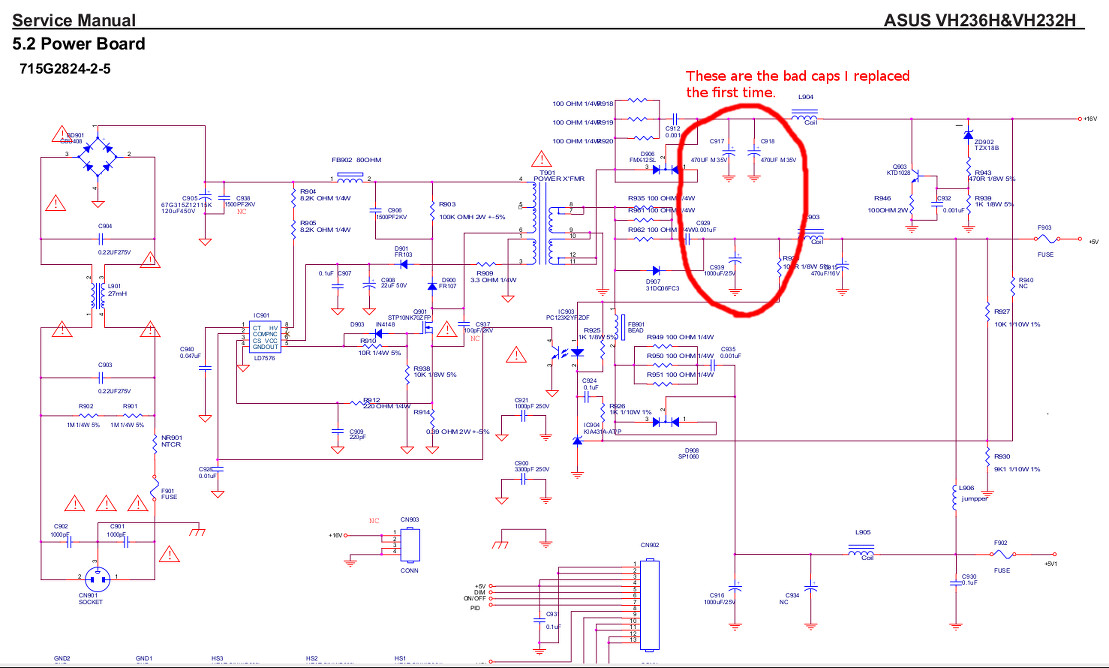
Since I'd found the asus vh236h service manual I looked up up which capacitors I had replaced the first time the monitor broke. The circuit diagram said they should be 470uF 35v but the actual parts lists says C917 and C918 are 067G215D6814KV CAP 105°C 680UF M 25V. My "temporary" replacements were 480uF 35v. The ones that I took out which broke were 680uF 35v. "Top Victory Electronics, Ltd." seems to think bigger is better so maybe I should still replace the "temporary" caps that still work.

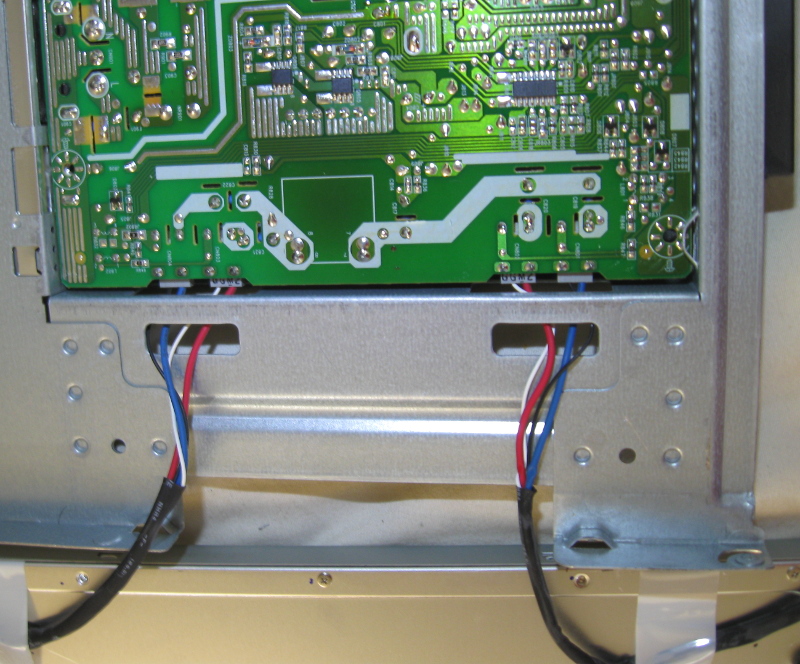
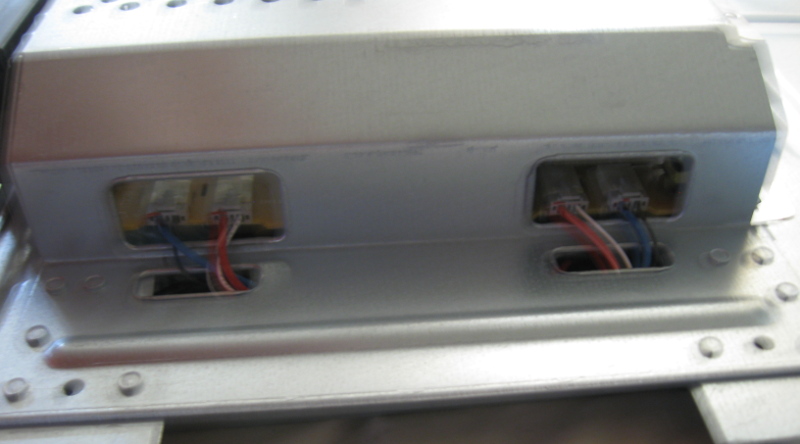
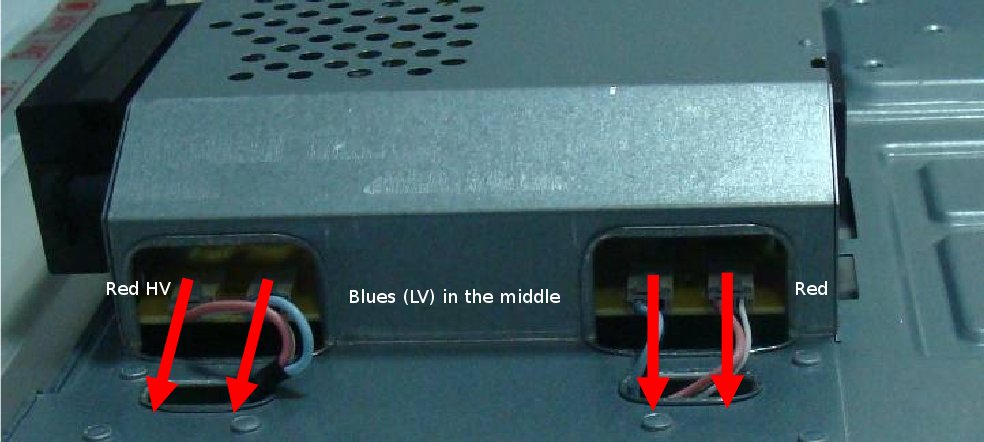
The lamp output HV/LV red/blue order in the service manual is different from the photos I took after I repaired mine the first time (and it worked for a year). So that's weird too. I guess there are just two backlights and the paths relative to the transformer outlet need to be the same but they can be switched.